| Revell 1/25 Orange Crate |
| |
 |
|
| I remember being terribly excited as a child of 10 to get
a Revell Orange Crate. I was easily amused. I also remember the lovely shower
of chrome bits that ensued when said Crate later hit the wall at high velocity.
Apparently it was a bit advanced for me at the time. Fast forward several,
ummm... decades (gulp) and the 10 year old child in me thinks he
has progressed enough to tackle the dreaded Orange Crate. Dang upstart youngster...
good cuff upside the head, that's what he needs. |
| |
 |
|
| In retrospect, it's pretty obvious why I didn't have such
a spiffy time building one of these back in 1975: chrome, and lots of it.
The key to my shame was that omnipresent line in car instructions that I
always ignored. "Scrape chrome away from parts that are to be glued",
or words to that effect. See? I still don't pay attention to it. There are
just way too many chrome pieces to be scraped on this thing to appeal to
the limited attention span of a 10 year old - or even a 40 year old for
that matter. This time I adopted a different approach. I got rid of the
chrome entirely, which was a quick and easy job with oven cleaner and an
old toothbrush. The slow and difficult part was cleaning up the horrible
seams and flash and filling the multitudinous ejector pin marks. This took
a good many hours and was about as enjoyable as that "Manual Disimpaction
Awareness" seminar I attended at the local retirement home. Once everything
was cleaned up - and not just at the retirement home - most of the pieces
actually fit together very well, especially given the age of the moulds.
|
| |
 |
|
| Now I've tried many a shiny silver paint over the years that
claimed to be "chrome" but were in reality just shiny silver paint.
In fact they looked about as chrome-like as a Chihuahua that had been dipped
in bacon fat and buffed with an electric floor polisher. So it was with
a great deal of skepticism that I elected to give Alclad II's rendition
of chrome a try for the first time. I'm pleased to say my doubts were completely
unfounded. The stuff is excellent and it actually looks like chrome. In
fact, I would say it looks much better than the chrome plated parts you
get in car kits which are usually far too bright and shiny. I wasn't too
sure about having to apply a coat of gloss black so I tried it without but
the Alclad finish is much duller without the undercoat. It does have the
advantage that you can at least check how the surface looks before you lay
on the chrome. Alclad II will take a certain amount of handling but will
still wear off the edges rather easily so it's best to handle the parts
as little as possible or wear gloves. All in all, it's damn fine stuff.
A little pricey (4 of the Queen's finest sterling for a 1 ounce bottle)
but it's more economical and practical than getting the parts re-plated
and I really don't think I could have completed the ol' Crate to my satisfaction
without it. Obviously this wasn't an option in 1975 and it probably wouldn't
have helped me much at the time anyway. |
| |
 |
|
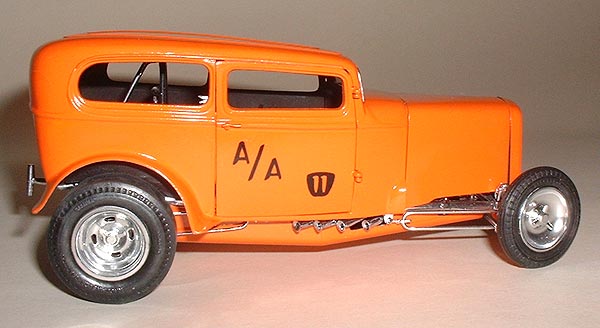
| The decals were a bit of a nightmare in spite of the fact
that they were beautifully printed and very thin. So thin in fact that they
broke into a buh-zillion pieces when I tried to apply them. Well okay, that's
a slight exaggeration. Maybe it was only half a buh-zillion pieces. Anyway,
it took me a good half hour (as opposed to some other kind of half hour?)
to re-build my shattered nerves along with that shattered rear decal. And
when I was finally able to sit back, slurp a stiff drink of tea and admire
my handiwork it suddenly occurred to me that the decal now read "ORANGE
RATE". Aaaaaaarrggh!!! Where's the @*%$!£?ing 'C' gone?!?!
Cleverly hidden under one of the many other bits of decal, that's where.
Fortunately, with copious amounts of water I was able to move everything
about and return the recalcitrant 'C' to its proper position. It's enough
to make you become an airplane modeller I tell ya. Oh wait.... I am
an airplane modeller. Well, no wonder I had trouble - there's no 'C' in airplane. |
| |
 |
|
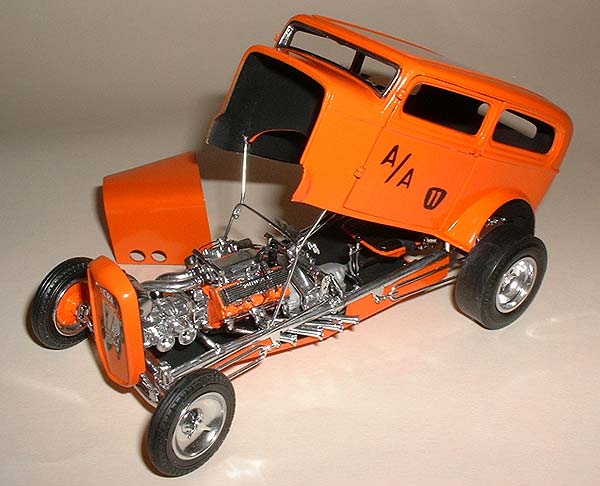
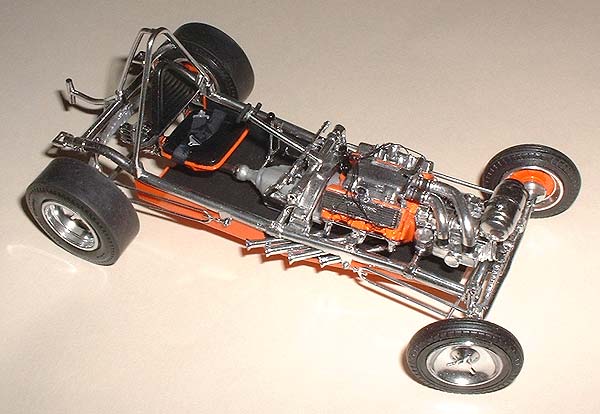
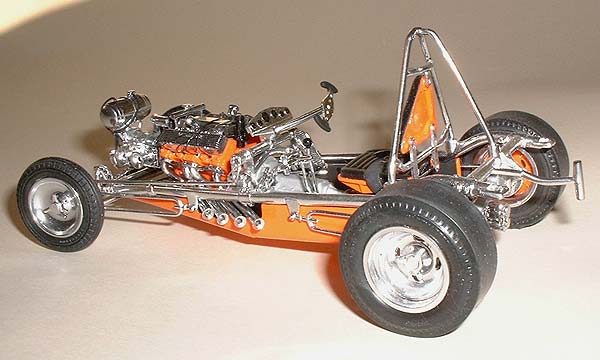
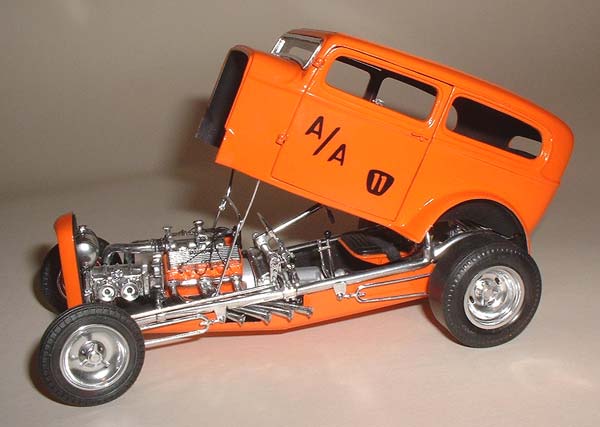
The best reference for the Orange Crate is actually the colour
picture on the box top, although there are also some good b & w pics
and a potted history here.
Like most racers - whether they be cars or airplanes - the details changed
often. The supercharger, for instance, is a dull aluminum colour on the box
top whereas later it was polished aluminum or chrome and the inside of the
body appears to be natural metal in some of the black & white pics instead
of the black seen in the colour photo. I think the wheels and fuel tank
should be polished metal rather than the chrome that Revell have finished
them in, but I didn't realise that until I had already painted them. The
difference is fairly subtle anyway so I can live with it.
The front wheel mounts have a lot of play in them which made it a fairly
easy matter to turn the wheels a bit, but of course the tie rod then needed
to be modified slightly as well. Other than that and replacing the flimsy
rear axle with 1/16th" music wire and adding spark plug wires, this
is built pretty much out of the box. The exhausts were particularly bad
mouldings and needed a lot of work to even remotely resemble round pipes.
I then drilled and hollowed these out as well as the vents on the cylinder
heads. |
| |
 |
|
| Et voilà: car # 2. A worrying trend you ask? Steering
away from aircraft (which does have a 'C' in it) and driving down the highway
of shiny cars for good? Nope, not at all. Just an occasional diversion from
the world of wings, wires and politically correct panel lines. That's my
story and I'm sticking to it. |
| |
 |
|
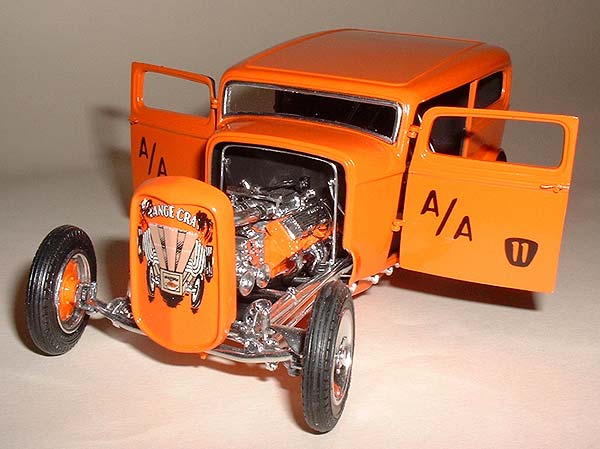
| Above: That was the best
fit I managed to get out of that resin hood. The other side looks even worse.
I understand the hood is resin in this re-release because the original mould
was damaged or missing. Or perhaps resin is more impact resistant than plastic
when striking a large immovable object (like a wall, for example) at high
velocity. |
| |
 |
|
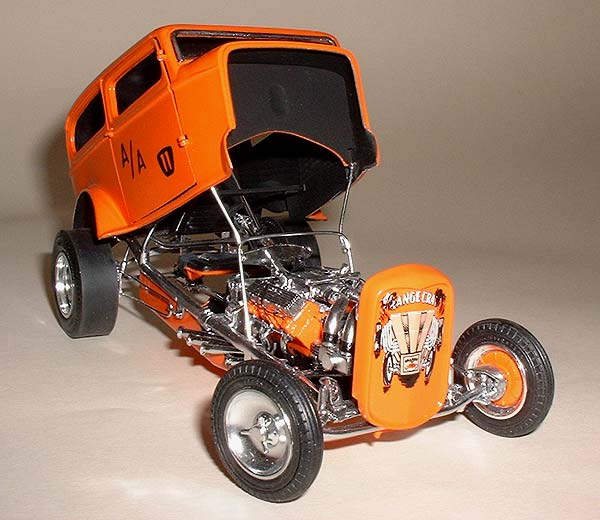
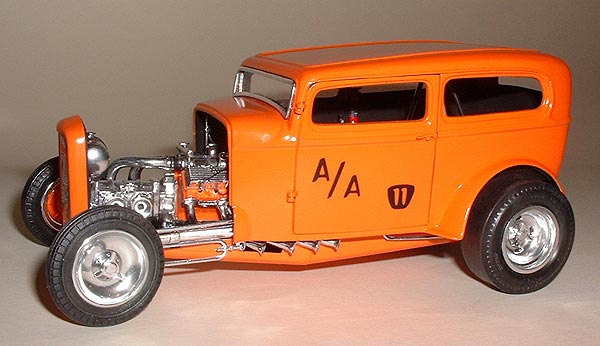
Above & Below: It works!
Well, temporarily anyway. I had a nasty feeling it was going to go very
badly if I kept playing with this thing and I intended displaying it with
the body up anyway so I glued the support after taking these pics.
Note that the door handles should be orange, not chrome, and that the longer
bits should point to the front instead of the rear as Revell have them in
the instructions. |
| |
 |
|
 |
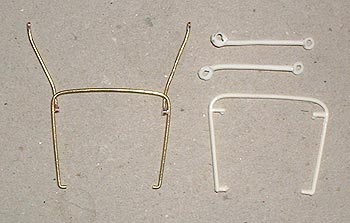 |
Above:
I didn't like the clunky body support so I made my own from .030"
brass rod with thin slices of 1/16th" tubing for the hinges.
I think it's a big improvement in spite of the fact that my initial
attempts at soldering were about as successful as a pair of bamboo
underpants.
|
|
Above:
All plated parts were stripped with oven cleaner and then the real
fun began. It may not look like much, but this picture represents
a good many hours of filing, filling, sanding & polishing. Oh,
and a bit of glueing.
Note the replacement rollbar support, the original having done a runner
down the drain when I was rinsing the oven cleaner off. Oops. |
 Left:
Amazing what you can do with a couple of Reheat 1/72nd scale data
placards and an instrument dial. Someday I'll even try them on a 1/72nd
scale plane. Left:
Amazing what you can do with a couple of Reheat 1/72nd scale data
placards and an instrument dial. Someday I'll even try them on a 1/72nd
scale plane. |
|
 Back to 1/25th Cars Main
 |
| |