| Tamiya F4D-1 Skyray |
| |
 |
|
| You'd think I'd never built one of these here plastic model
thingies before. I had no end of trouble with this and as it's produced
by the great and powerful Tamiya and I have yet to hear of anyone else having
anything but praise for this kit I can only assume the problems were caused
by yours truly. Perhaps all that solvent inhaling is finally starting to
take its toll. |
| About a year ago I was going through my "can't seem to
be bothered with models anymore, I'd best sell my entire collection"
phase so I started the Skyray as a simple "out of box" experience
to try and get me building again. Unfortunately, getting the pieces out
of the box is about as far as I got at the time. A couple of months ago
I hauled the Skyray out, kicking and screaming, and I'm now happily building
again. Apparently that electro-shock therapy worked wonders. At least I
think it did. Ummm.........errrr. . . . what was I saying? Toto, where have
you gone? Aunty Em!!! |
| |
 |
|
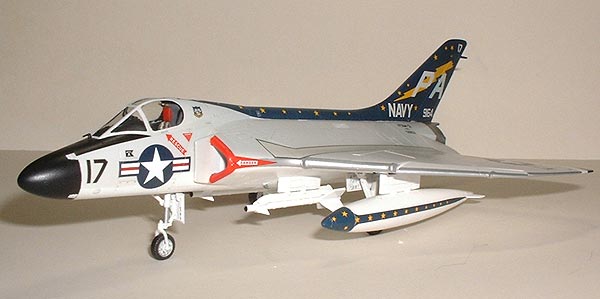
| Of course I couldn't build the damn thing out of the box though
could I? Good heavens no, that wouldn't appeal to my masochistic nature.
I decided to drop the leading edge slats as most pictures I found of Skyrays
showed them parked this way. As this aircraft was from the same stable as
the later A-4 Skyhawk I'm guessing that the slats worked on the same principle.
That is, they aren't power operated; they are spring loaded and are raised
by the air flow when the aircraft has reached a certain speed, lowering
again when the air speed is low enough to permit the springs to push the
slats out. This apparently caused some interesting low speed flight characteristics
when one slat would deploy slightly before the other. It is for this reason
that the slats on the Blue Angels' A-4s were locked in the closed position.
But I digress. |
| Dropping the slats proved to be a relatively simple and painless
procedure, although why Tamiya didn't include them as seperate parts like
they did in the larger, optically challenged scale is beyond me. It's discrimination
against us manly scale types I tell ya!! |
| |
 |
|
| Things seemed to go decidedly downhill fit-wise after the
minor surgery to the wings though. The upper and lower fuselage halves went
together alright but there was a nasty seam in the intakes that needed to
be taken care of. Not the easiest to get rid of in such a confined area
but I managed to fill it with super glue and eradicate the join with a tiny
bit of sandpaper glued to the end of a scrap of wood. The intakes themselves
were a very poor fit and quite a bit of filling and sanding was required
to blend them in. Frankly I never really did get them to my satisfaction
but at that point I'd had enough grief from them. |
| Only the front and rear of the drop tank pylons touched the
underside of the wing because the mating surfaces of the pylons had too
much curvature to them and didn't match the shape of the wing. Several minutes
of carving and sanding mostly cured the problem. |
| The fit of the canopy left rather a lot to be desired as well
and some filler was needed to blend in the windscreen. |
| |
 |
|
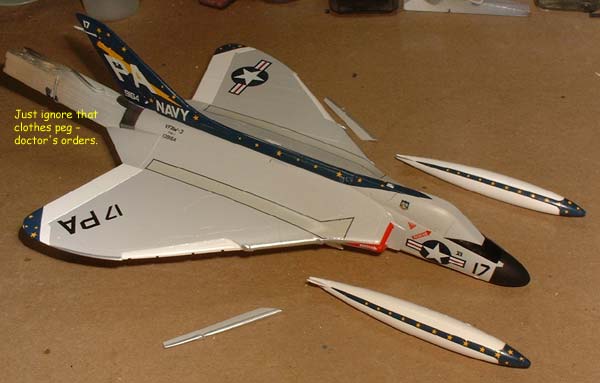
| By far the biggest trouble I had with this kit was the main
landing gear. It took ages to get the things shoe-horned in there (snapping
one off in the process of course) and even then they were badly mis-aligned,
the wheels pointing out at ridiculous angles. Amazingly, I was able to twist
the gear into alignment without further breakage. I can only assume that
I somehow installed the wells incorrectly and that caused the trouble. Because
of the landing gear's reluctance to fit I broke (no pun intended) with my
own tradition and installed the main gear before any painting was done in
case things got nasty and the paint job suffered as a result. |
| I found it rather difficult removing the seam on the leading
edges of the wings because of the fences moulded in and I would have preferred
these to be seperate pieces - if they fit! |
| |
 |
|
| I figured my troubles were over after getting to the paint
and decal stage but alas, no. I used Gunze Light Gull Gray and Tamiya Gloss
White for the main colours with the radome in good old Humbrol Flat Black.
The leading edges of the wings are Humbrol Metalcote Polished Aluminum and
the exhaust bits are a 50/50 mix of Metalcote Gunmetal and Polished Aluminum. |
| Tamiya's decals proved to be as poor fitting as the rest of
the kit and I ended up with a nice gray seam in the dark blue spine which
I had to touch up. I almost matched the colour with Humbrol Midnight
Blue with a touch of medium gray in it. Almost. In their favour though I
must say I was impressed at how well the red intake warning decals went
on, albeit with copious amounts of setting solutions and some touch up afterwards.
The decals themselves were rather thick but did settle down very nicely
with Microset followed by some Solvaset when they were almost dry. Using
Solvaset straight away proved to be a near-disaster as the decals wrinkled
up like an elderly woman in a hot tub. Much poking and prodding was needed
to get them to lie flat, also like an elderly woman in a hot tub. I replaced
the kit stars and bars with some from Repli-Scale as I don't like that off-white
colour that Japanese decal manufacturers insist on using. |
| And to finish it all off, a coat of Tamiya semi-gloss clear
which promptly "orange peeled" on me and looked like crap when
it was dry. More sanding, another coat of clear with a bit more thinner
and less air pressure and I'd had enough. Not one of my better efforts,
but I'm happy with the way it turned out (eventually) and I can now return
for a follow-up treatment of Prozac before finishing my latest project.....
the dreaded Roden
Lagg-3. |
| |
 Back
to 1/72 Aircraft Main Back
to 1/72 Aircraft Main |
| |