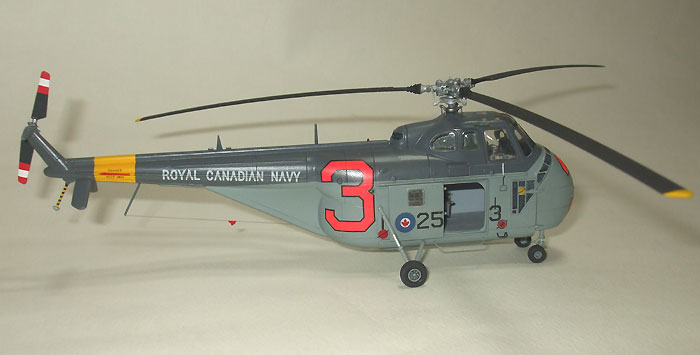
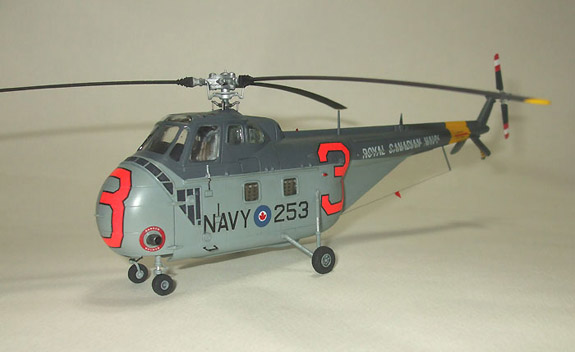
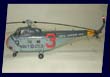
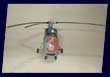
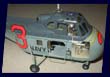
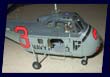
| Italeri 1/72 HO4S-3 |
|
| Another of those quick, easy, out-of-the-box builds to help me get through
a bad case of modeller's block. That was my intention when I started this
thing two years ago anyway. It didn't quite work out that way of course;
it rarely does. |
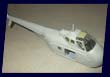
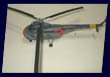
| The Italeri kit is very good and goes together well though there are some
bizarre anomalies and inaccuracies. Two of the braces on the screening under
the windshield are missing on the right side for instance, a fact I didn't
notice until the kit was almost complete and had to carefully add from plastic
strip to avoid damaging the paintwork. Also, while they include the step
on the left and have moulded holes to glue it in, they neglected to represent
this on the right side. The step was a bit thick anyway so I made both from
brass rod as well as the large one under the sliding door which was also
missing from the kit. There were some round lumps moulded on the spine of
the fuselage which I could not see in any photos of these machines so I
removed them along with the beacon directly behind the rotor head. This
should be located on the spine in line with the navigation lights on the
fuselage sides. I added this from a small piece of clear red stretched sprue.
The antenna fit was nothing like that on late RCN aircraft so these were
made from .005" plastic with the taller forward one coming from the
scrap box. |
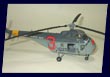
| The hoist that Italeri include represents the early version fitted to
HO4S-2s and possibly some early -3s. I intended scratchbuilding the later
version until I discovered a picture of this particular machine which shows
it didn't have a hoist fitted at all - problem solved! Of course I didn't
find this picture until I had already drilled holes for the new hoist so
had to improvise and fit tiny mounting brackets made from scraps of photo
etch frame to cover the holes. The one in the window (the top mounting goes
through the rear window on the right side) I had to leave as is. |
| (Click thumbnails to change image) |
|
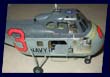
Paint is Xtracolour Medium Sea Grey and Extra Dark Sea Grey with Humbrol
flat black & gloss yellow on the rotor blades. The main rotor head was
done in Testors Metalizer Steel with a wash of dark grey and a dry brush
of Humbrol Metalcote Aluminium.
I used decals from the Belcher Bits helicopter sheet, a decision I was to
regret when it came time to apply them. There are several problems with
these decals, the biggest being that no concessions were made to the extreme
compound curves of the beast when designing the sheet. The large '3' on
the nose was the worst offender, when first applied it was so distorted
it very nearly became an '8'! I had to do some serious cutting and patching
to get it to even remotely resemble a '3'. The large numbers on the side
also required a bit of slicing and dicing though were nowhere near as bad.
There was a similar issue with the Royal Canadian Navy markings however.
Though they were printed at the regulation height of 10 (scale) inches,
when applied over the large strengthening strake on the tailboom they became
almost illegible. Fortunately Italeri took this into consideration and printed
theirs quite a bit taller so I used the markings from the kit sheet, though
they were spaced too closely together and had to be cut into three seperate
words and spaced apart properly when applied. Despite the Belcher Bits instructions
saying that the tail rotor warnings had red arrows with black lettering
these markings were printed entirely in red. I had to steal the lettering
from one of the Sea King options from the same sheet to correct this. As
a final ignominy, the maple leafs on the roundels were out of register so
I used some from an old IPMS Canada RCN sheet. On the plus side, the decals
are nice and opaque and settle down very nicely with applications of Microsol.
Nonetheless, it was a lot of work to get them to look halfway decent and
with the nasty patch job on the nose being quite noticeable up close I was
rather disappointed with the Belcher Bits decals. |
| Most of the Canadian HO4S-3s had a small triangular red flag on the lower
antenna wire, which I imagine was there to stop people tripping over the
wire on the ground and breaking their necks. I made this from a small triangle
of cigarette paper soaked in diluted white glue and painted flat red when
dry. The wire itself was stretched sprue. Actuating rods on the main and
tail rotors were far too thick and were replaced with .015" plastic
rod. |
| Only another dozen or so old projects to clear off the workbench and I
can start something new... |
| |
 Back
to 1/72 Aircraft Main Back
to 1/72 Aircraft Main |
| |